Wednesday, May 17, 2023

May 2023 Card Layout #2

 May 2023 Card Layout #2
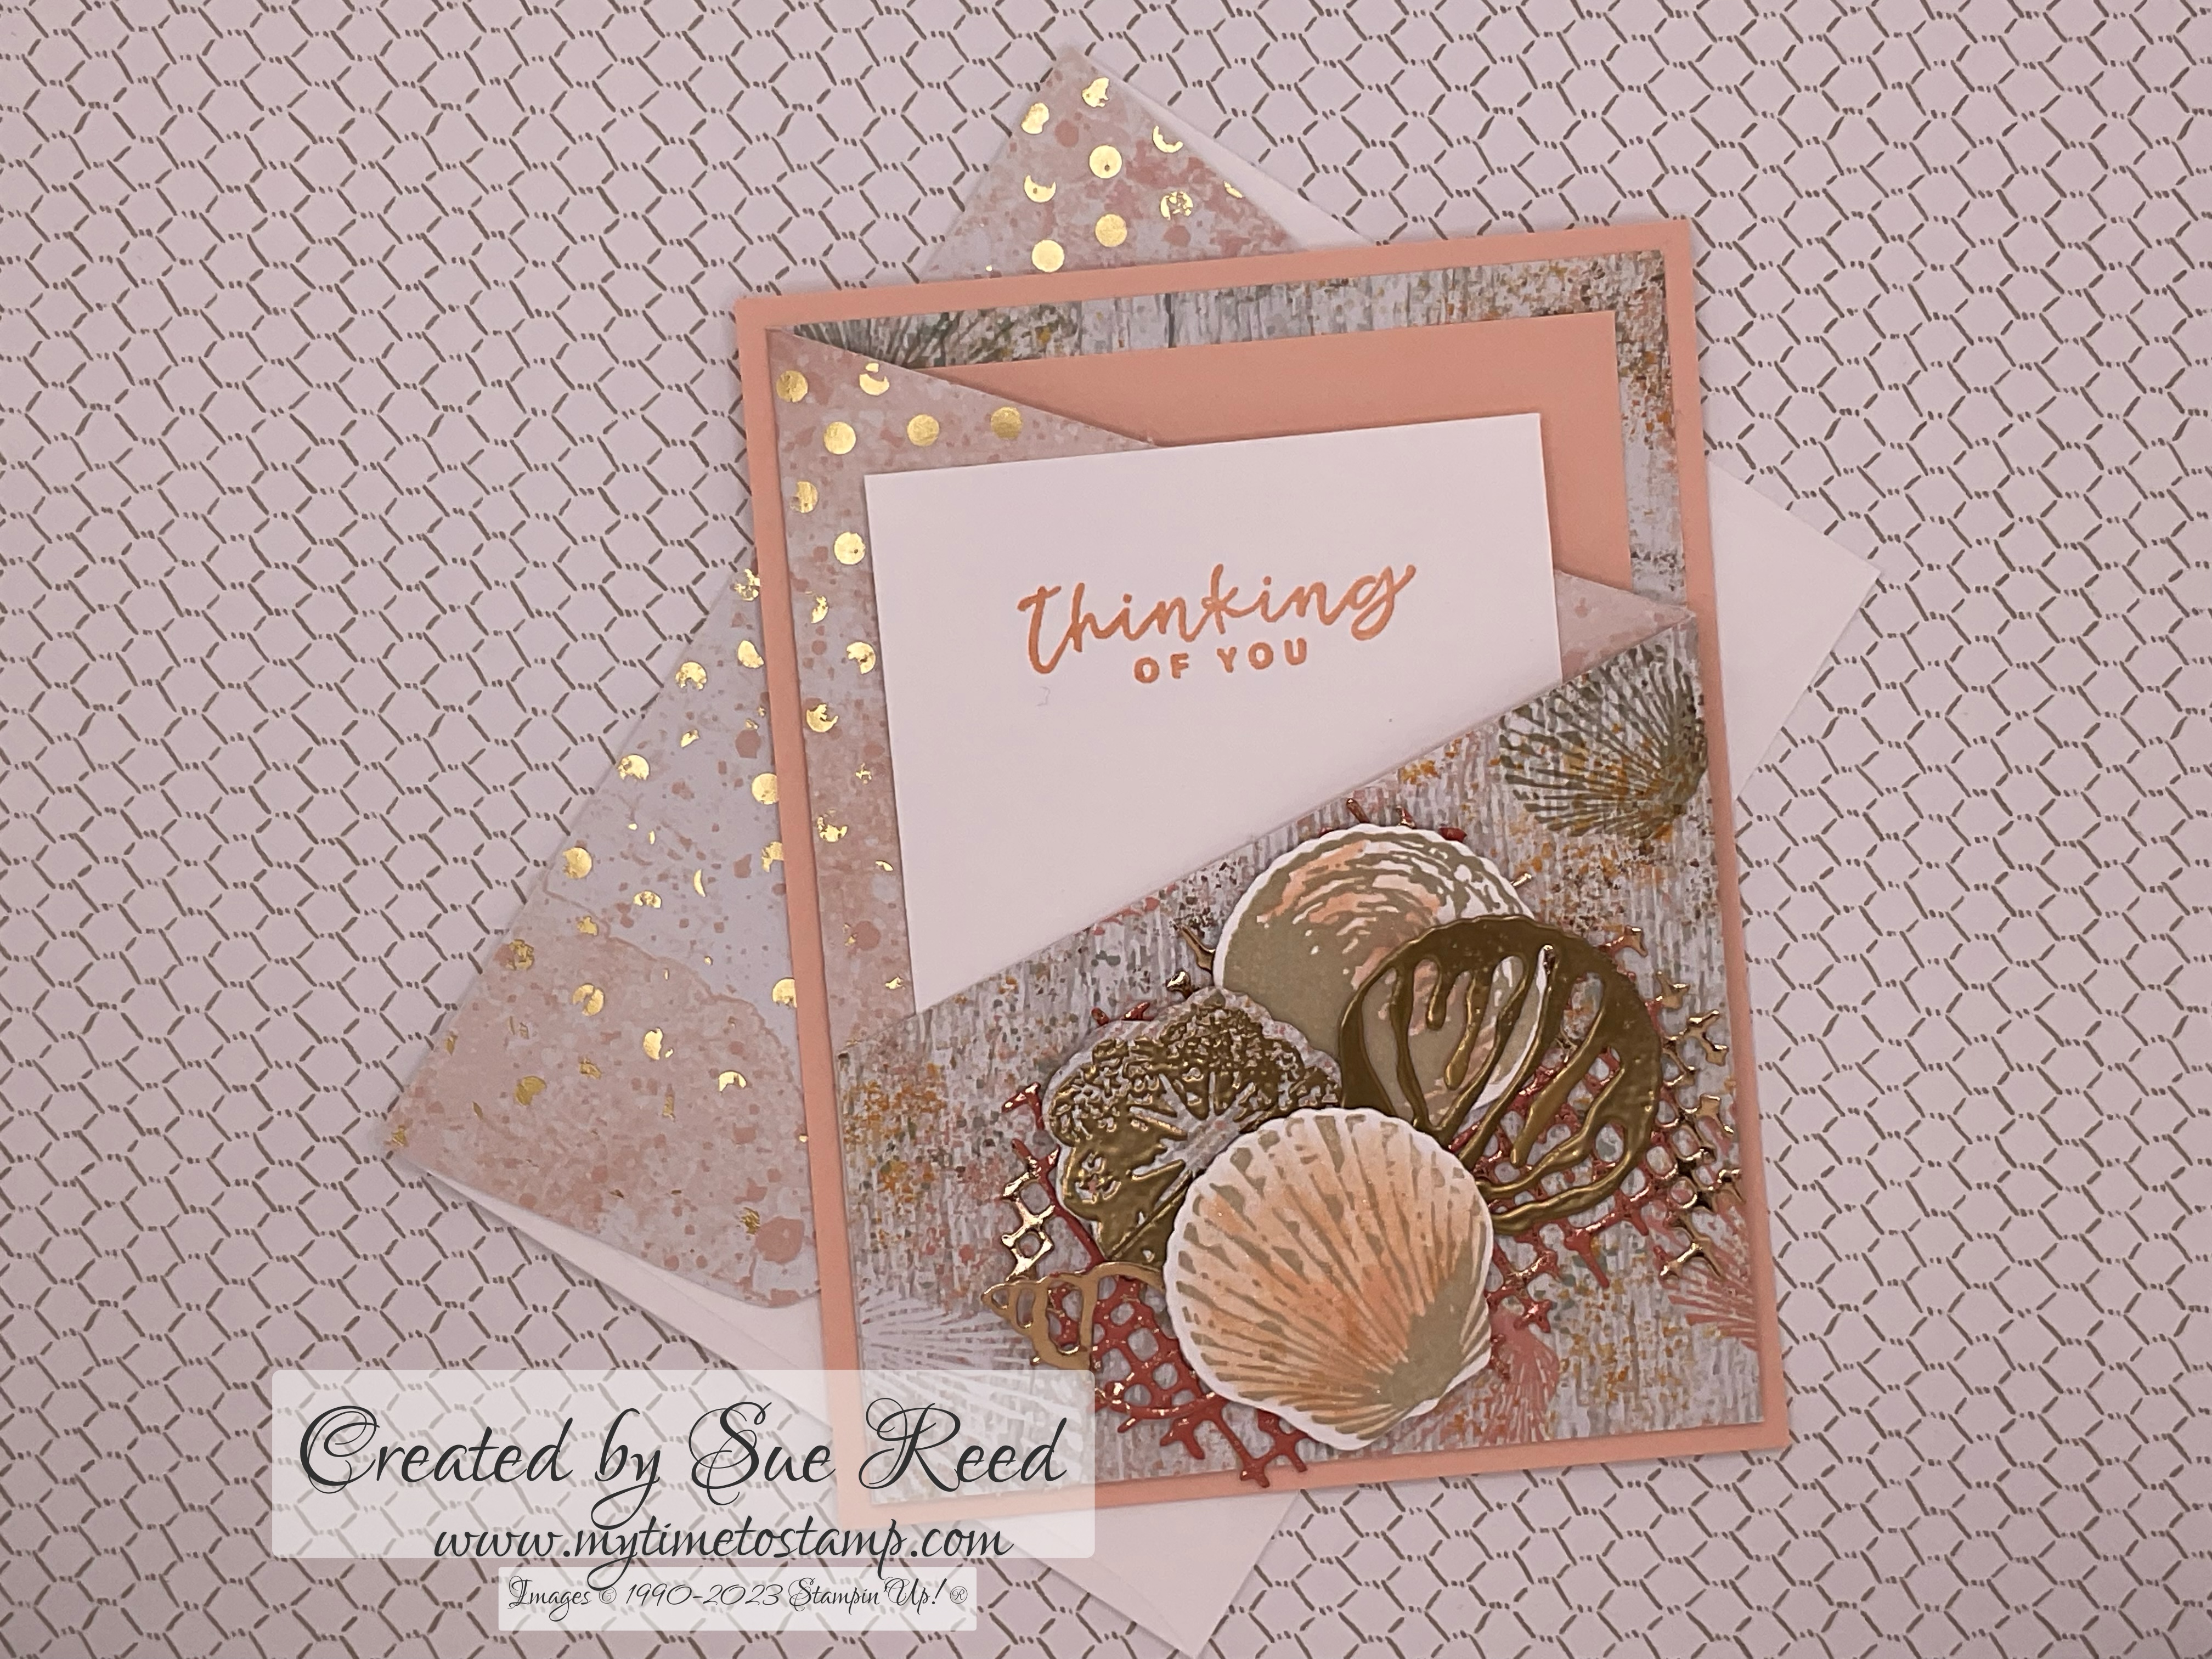
SU’s Irresistible Blooms Bundle and Hello, Irresistible DSP

Great layout so show off this DSP. I was lucky to have some retired Lost Lagoon ribbon and some retired Pretty Peacock rhinestones to add. There is a new ribbon called Lost Lagoon Bordered Ribbon in the annual catalog as well as Tinsel Gems in both Lost Lagoon and Pretty Peacock. And Adhesive-Backed Sequins Trio for Pretty Peacock.


Measurements:
  • 5 1/2” x 8 1/2” cardstock, scored at 4 1/4” and folded on the score line for the card base.
  • 4” x 5 1/4” cardstock for panel for the card front.
  • A scrap of matching cardstock.
  • DSP 2 1/4” x 5” and 1 1/2” x 5; 2 1/4 x 6” panel for the envelope
  • 4” x 5 1/4” white cardstock for inside of card; scraps of white for leaves and sentiment
  • 5 3/4” piece of ribbon
Directions:
  • Adhere the DSP panels to the cardstock panel for the card front.
  • Add ribbon on the seam and adhere to back of cardstock with tape.
  • Adhere the DSP panel to the card front.
  • Stamp sentiment on white cardstock scrap and punch out with the double oval punch. Punch out the larger oval from the matching cardstock scrap. Adhere the sentiment to the larger oval. Adhere to card front with dimensionals. 
  • Stamp leaves on the white cardstock scrap and die cut. Adhere to card front with dimensionals.
  • Adhere the DSP panel to the envelope flap and trim.
  • Add embellishements.
You can find the SU products needed to make this card in my Online Store
 
SUProducts:
  • Irresistible Blooms Bundle 161151
  • Helllo, Irresistible DSP 161139
  • Lost Lagoon Cardstock 133679
  • Pretty Peacock Cardstock 150880
  • Basic White Cardstock 159276
  • Lost Lagoon Bordered Ribbon 161171
  • Tinsel Gems: For Lost Lagoon 161624; for Pretty Peacock 161623 
  • Or Adhesive-Backed Sequins Trio for Pretty Peacock 161206

Friday, May 5, 2023

May 2023 Card Layout #1

 May 2023 Card Layout #1
SU’s Countryside Corners Bundle, Something Fancy Dies and Countryside Inn DSP

The card challenge was to make a strip card so I made two different versions. One a simpler version and one stepped up version. Love this DSP!! All those blues!!

Here is the simpler version:


And here is the stepped up version:


Measurements:
  • 5 1/2” x 8 1/2” cardstock, scored at 4 1/4” and fold on the score line to make the card base.
  • Two @ 4” x 5 1/4” cardstock-one for the inside
  • Several strips of patterned paper cut at different widths and about at least 5 inches long.
  • 2 1/2” x 6” panel for the envelope flap.
  • White cardstock scrap for sentiment,
  • Vellum scrap.
  • Embellishments of your choice.
Directions:
  • Adhere strips of patterned paper to one of the white cardstock panels. Trim off excess.
  • For the simple version: Adhere the panel to the card front. Stamp the sentiment on the white cardstock scrap and die cut it with the smaller die from the Something Fancy Dies. Die cut the vellum scrap with the larger die from the Something Fancy Dies. Adhere the sentiment to the vellum. Add to card front with dimensionals.
  • For the stepped up version: Die cut the strip panel with 2 layering dies from the Countryside Corners Dies. Add the card strip die cut to the card front with dimentsionals. Follow the same directions for the sentiment and vellum layers as in the simple version but adhere without using dimensionals.
  • Add embellishments.
  • Adhere the other white panel to the inside of the card.
  • Adhere the patterned paper panel to the envelope flap and trim.
The SU products used to make this card can be found in my Online Store

SU Products:

Friday, April 14, 2023

April 2023 Card Layout #8

 April 2023 Card Layout #8
SU’s Rhino Ready Stamp Set and Flowers and More DSP
Tag Fun Fold Card

A fun fold using the cute rhino image from SU’s Rhino Ready Stamp Set and SU’s vibrant colors Tahitian Tide and Parakeet Party. 


Measurements: 
  • 4 1/4” x 11” cardstock
  • 3 3/4” x 4”; a 4” square; and 2 1/2” x 6” DSP for the envelope flap
  • 2 1/2” x 4” white cardstock, scraps for images and sentiment
Directions: 
  • Score the cardstock panel at 4” and 6 3/4”. Fold accordion style.with the larger panel for the bottom of the card base.
  • Adhere the 4” square DSP to the bottom panel. 
  • Corner punch the top panel of the card base. Corner punch the 3 3/4” x 4” at the top. Adhere it to the top panel of the card base. 
  • Stamp image and/or sentiment to white cardstock panel and adhere it to the inside panel of the card base.
  • Stamp/color and die cut images and adhere them with dimensionals to the top panel of the card base. (I used alcohol markers to color my images.)
  •  Stamp a sentiment on a label or shape and adhere to the top panel of the card base.
  • Punch a hole at the top and add ribbon to make the tag.
  • Adhere the DSP to the envelope flap and trim.
Products needed to make this card can be found in my Online Store
  • Rhino Ready Stamp Set 160959
  • Flowers and More DSP 160802
  • Tahitian Tide Cardstock 159261
  • Basic White Cardstock 159276
  • 1/8” Metallic Woven Ribbon Parakeet Party 159196 and Tahitian Tide 159197

Thursday, April 13, 2023

April 2023 Card Layout #7

 April 2023 Card Layout #7
SU’s Covered in Sunshine Stamp Set, Desert Details Dies and Fancy Flora DSP

A very simple layout to show off the beautiful sentiment from the Covered in Sunshine stamp set.


Measurements:
  • 5 1/2” x 8 1/2” cardstock, scored at 4 1/4” and folded to make the card base.
  • 4” x 5 1/4” cardstock layer
  • Cut four strips at 3/4” x 4” all DSP or a combination of colored cardstock and coordinating DSP
  • Cut 2 1/2” x 6” panel of DSP for the envelope and 1/2” x 4” strip for inside of card.
  • White cardstock about 2 1/2” x 4” for label and 4 x 5 1/4” for inside
Directions: 
  • Adhere the four DSP strips to the cardstock layer.
  • Use a positioning tool and Stampin’ Write markers to stamp the sentiment on white cardstock for the label. Die cut label with die from the Desert Details dies. (The label should be big enough to cover the four 3/4” strips.)
  • Adhere label with dimensionals to the cardstock layer.
  • Adhere the cardstock layer to the card front. 
  • Adhere the trim strip of DSP to the inside white cardstock layer. Adhere the white cardstock layer to the inside of the card.
  • Adhere the DSP envelope panel to the envelope flap and trim.
The products needed to make this card can be found in my Online Store

Products: 
  • Covered In Sunshine stamp set 160726
  • Desert Details 160531
  • Fancy Flora DSP 160413
  • Soft Sea Foam cardstock 146988
  • Calypso Coral cardstock 122925 
  • Pool Party cardstock 122924 
  • Fresh Freesia cardstock 155613 
  • Subtles Stampin’ Write Marker Assortments 147156 
  • Basic Gray Stampin’ Write marker
  • Basic White cardstock 159276

Monday, April 10, 2023

April 2023 Card Layout #6, Part 2

April Card Layout #6, Part 2
SU’s Desert Details Bundle and Delicate Desert DSP.

This fun fold card is sometimes called the lattice split card or lattice front card. For my first version in part 1,  I used SU’s Nature’s Prints Bundle and Sun Prints DSP. Be sure to go to my blog post for part 1 of this fun fold for measurements and pictures to help with the construction of this layout. 

After thinking about this fun fold, I wanted to make the fence look like the fences we have for our horses. Many of the fence posts are railroad ties-pretty much a solid rectangle piece of wood treated with creosote, a black tar like substance. Here is my version.


For this version of the lattice front card, I started with 8” x 4 1/4” card base, scored 
at 5 1/2”. I used SU’s blending brushes to make a sunrise/sunset to the top portion of the card front with SU’s Classic Stampin’ Pads for Mango Melody, Cajun Craze, Calypso Coral, and Pumpkin Pie.

I die cut nine strips of Soft Suede cardstock about 4 1/2” long using the die from the Desert Details Bundle. Then use a sponge dauber and Soft Suede ink to darken each strip to look like creosote. Next put a piece of painter’s tape down back side of the top of the card front.  Add 5 of the strips to the sticky side of the painter’s tape starting with the first strip line up with the bottom of the card. (Post It Labeling and Coverup Tape can be used also.)

Adhere two strips side by side to the 5 strips with liquid adhesive to make each of the fence posts look wide like railroad ties. After the adhesive dried, I removed the painter’s tape and trimmed the excess from the ends of the fence posts. 

I added a 4 1/4” x 5 1/2” piece of Desert DSP to the inside of the card so that it would show through the picket fence like a green pasture. I stamped and die cut images for the card front and added some embellishments. I adhered and trimmed a  2 1/2” x  6” panel of DSP to the envelope flap.


April 2023 Card Layout #6 Part 1

 April 2023 Card Layout #6 Part 1
SU’s Nature’s Prints Bundle and Sun Prints DSP

This layout has been very popular lately on many blog posts and on Pinterest. It is sometimes called the lattice split card or lattice front card. I started with SU’s Nature’s Prints. (Stay tuned for another version of this layout part 2.)


Start with an 4 1/4 x 11 card base. Score at 5 1/2”. Then cut six strips 1/2” x 4 1/4” wide from one end. 


Then add a strip of painters tape to the front of the card base with the sticky side up. (I used Post-It Labeling and Cover-up Tape.)
 

Next place one of the six 1/2” strips at the bottom of the card front. The sticky side of the tape will hold it in place.


Add three more 1/2” strips starting at the top and positioning the strips to make the picket fence.


Use the last two 1 /2” strips as the picket fence posts. Adhere them to the four picket fence pieces. I used a small dot of liquid adhesive on each of the fence pieces to hold the fence posts in place.


Allow the glue to dry, and then remove the painter’s tape carefully. Add stamped/die cut images and sentiment.

It’s optional to adhere a 3 1/8” x 4 1/4” panel of DSP to the back of the picket fence pieces for a background or leave the fence open. You can also add a piece of DSP to the inside of the card base.

Saturday, April 8, 2023

April 2023 Card Layout #5

 April 2023 Card Layout #5
SU’s Nature’s Prints Bundle and Sun Prints DSP

A great fun fold for using Stampin’ Up! designer series paper.  Two versions have been included in this post, each one showing one side of the double sided Sun Prints DSP. Plus you can get 3 cards from one sheet of DSP.


Measurements:
  • 4” x 12” double sided paper; 2 1/2” x 6” for envelope flap
  • 4 1/4” x 5 1/2” cardstock for card base
  • 3 3/4” x 5” neutral cardstock for inside
  • Cardstock scraps for stamping and die cutting images.
Directions:
  • Score the double sided paper at 3/4”, 3 1/2”, and 8 3/4”. Fold and glue down the most narrow panel.
  • Adhere the double sided paper to the card base.
  • Stamp and adhere the neutral panel to the inside.
  • Die cut a focal shape (rectangle, circle, square, label).
  • Stamp and die cut images. Adhere to the focal shape.
  • Adhere double sided paper to the envelope flap and trim.
The products used to design this card can be found in my Online Store

Products: For the first version of the card.
  • Nature’s Prints Bundle 158801 
  • Sun Prints DSP 158790 (available until May 1, 2023, until supplies last)
  • Gray Granite cardstock 146983
  • Starry Sky cardstock 159263
  • Basic White cardstock 159276
  • Fern 3D Embossing Folder 158804
  • Starry Sky Classic Stampin’ Pad 159212
  • Basic Stampin’ Emboss Powders 155554
  • Solid Faceted Gems 159189

Thursday, April 6, 2023

April 2023 Card Layout #4

 April 2023 Card Layout #4
SU’s Desert Details Bundle along with Delicate Desert and Dry Brushed Metallic Specialty DSP

Another fun fold today. Great use of DSP.


Measurements:
  • 5 1/2” x 8 1/2” cardstock for base
  • 3 1/4” x 5 1/2” cardstock 
  • DSP 4” X 5 1/4”, 2 1/2” x 5”, 2 1/2” x 6” for envelope flap; scraps for die cuts
  • 4” x 5 1/4” neutral cardstock for inside 
  • Cut two 1” x 5” strips
  • Scraps of cardstock for stamping and die cutting
Directions:
  • Score cardstock for base at 4 1/2”. Fold on score line.
  • Score cardstock at 1/2” at one end. Fold on score line and glue to inside card base to make the flap.
  • Adhere the larger DSP panel to the front of the card base. Adhere the neutral cardstock to the inside of the card base. This will cover up the panel seam somewhat on the inside of card.
  • I die cut two strips of Cajun Craze cardstock. Adhere the smaller DSP panel to the front card flap. Adhere the two Cajun Craze strips, one on either side of this DSP.
  • Stamp and die cut flowers. Die cut the cactus leaves. Adhere to the front card flap with dimensionals.
  • Adhere the DSP to the envelope flap and trim.
SU products used to make this card can be found in my Online Store.

Products:
  • Desert Details Bundle 160532
  • Delicate Desert DSP 160521
  • Dry Brushed Metallic Specialty DSP 160837
  • Gray Granite cardstock 146983
  • Cajun Craze cardstock 119684
  • Basic White cardstock 159276
  • Calypso Coral 122925 and Gray Granite 147118 Classic Stampin’ Pads

Wednesday, April 5, 2023

April 2023 Card Layout #3

 April 2023 Card Layout #3
SU’s Season of Chic Bundle and Texture Chic Specialty DSP

A fun fold with a pocket. In early March I posted another version of this card made with SU’s Irresistible Blooms Bundle with two pocket cards. Now I have finally finished this version. On this version there is only one pocket card on the front, and the card opens to an inside panel.


Measurements:
  • Card base 4 1/4” x 5 1/2” cardstock
  • Patterned paper 5 1/4” x 12”; 2 1/2” x 6” for envelope and scraps for flower, shell and netting
  • White cardstock 3” x 4 1/4”; scraps to stamp shells land flower
  • Colored cardstock 3 1/2” x 4 3/4”
Directions:
  • Score patterned paper @ 4” and 8”. Fold on score lines. 
  • Unfold the DSP. Mark up two inches from the bottom of the first section. Cut from top of the second fold across to the mark. The finished cut should look like this:


  • Fold on the score lines for the zig-zag:

  • Add Tear and Tape or a very thin line of liquid glue as shown below:


  • Fold the flap back again to form the front pocket so the white cardstock fits inside:

  • Add the panel to the inside of the card.
  • Stamp shells on white cardstock with Sahara Sand Classic Stampin’ Pad. Die cut. Color shells using ink from Petal Pink Classic Stampin’ Pad and Wink of Stella.
  • Die cut flower and open shell from the DSP and heat emboss with gold embossing poweder.
You can find the SU’s products that you need to make this card in my Online Store

SU Products:
  • Season of Chic Bundle 158816
  • Texture Chic DSP 158808
  • Dry Brushed Metallic Specialty DSP 160837
  • Petal Pink Cardstock 146985
  • Basic White Cardstock 159276
  • Petal Pink 147108 and Sahara Sand 147117 Classic Stampin’ Pad
  • Stampin’ Emboss Powders Metallics 155555
  • VersaMark Ink 102283

April 2023 Card Layout #2

 April 2023 Card Layout #2
SU’s True Beauty Bundle and Awash In Beauty DSP
A fun fold with the gorgeous SU’s Awash In Beauty DSP. 


Measurements:
  • 4 1/4” x 8 1/4” cardstock for base
  • 8 1/2” x 2 3/4” cardstock for second card base
  • DSP or neutral cardstock 3 1/4” x 2 1/2”
  • DSP or embossed cardstock 4” x 5 1/4”
  • DSP 2 1/2” x 4”
  • DSP 5/8” x 4”
  • DSP 2 1/2” x 6” for envelope flap
  • Neutral 3 1/4” x 2 1/2” for inside
  • White Cardstock scraps for stamping the flowers and leaves
Directions:
  • Score base cardstock at 2 3/4”
  • Score cardstock for second card base at 3 1/2” and 2 3/4” and glue the left side together to form book binding card base.
  • Adhere the larger DSP panel to card base on the left side.
  • Adhere DSP to the outside of the right flap on card base.
  • Adhere 5/8” DSP panel to left side of second card base for the book binding.
  • Adhere the 3 1/4” x 2 1/2” DSP or neutral panel to front of second cardstock card base.
  • Add die cuts or shapes or sentiment and embellishments. On a couple of the flowers and the leaves, I stamped off once. I die cut the sprigs out of some of the DSP.
  • Adhere DSP to envelope flap and trim.
Products need to make this card can be found in my Online Store

SU’s products:
  • Awash In Beauty DSP 158973
  • Mossy Meadow Cardstock 133676
  • Basic White Cardstock 159276
  • Calypso Coral 147101, Polished Pink (no longer available), Blackberry Bliss 147092 and Mossy Meadow 147111 Classic Stampin’ Pads


Tuesday, April 4, 2023

April 2023 Card Layout #1

 April 2023 Card Layout #1
SU’s Petal Park and Sentimental Park Bundles and Flowers and More DSP

Really love the Flowers and More DSP. It brightens up this layout!! And SU’s Tahitian Tide In Color is my favorite from the 2022-2024 In Colors!!


The products needed to make this card can be found in my Online Store

Measurements:
  • 5 1/2” x 8 1/2” cardstock, scored at 4 1/4”and folded on the score line.
  • 4” x 5 1/4” cardstock layer
  • 1 3/4” x 5 1/4” patterned paper
  • 3/4” x 5 1/4” patterned paper
  • About 2 1/4” x 3 1/4” for label neutral cardstock
  • White cardstock scraps
Directions:
  • Adhere the cardstock layer to the card front.
  • Adhere the two patterned paper panels to card front.
  • Stamp flowers on white cardstock scraps and punch out. Add to label with dimensionals.
  • Add label to card front with dimensionals.

The products needed to make this card can be found in my Online Store

Stampin’ Up! products used:
  • Flowers and More DSP ( patterned paper) 160802
  • 2022-2023 In Color 6”x6” DSP (patterned paper) 159253
  • Tahitian Tide cardstock 159261
  • Night of Navy cardstock 100867
  • Basic White cardstock 159276
  • Night of Navy Classic Stampin’ Pad 147110
  • Tahitian Tide Stampin’ Blends Combo Pack 159221
  • Enamel Dot Essentials 160751


Wednesday, March 22, 2023

March 2023 Card Layaout # 19

 March 2023 Card Layout #19
SU’s Sentimental Park and Petal Park Bundles. Also the Around the Bend and Radiating Stitches Dies

Another fun fold thanks to Rachel Tessman’s Facebook Live today. 

Products needed to make this card can be found on my Online Store


Measurements:
  • 5 1/2” x 8 1/2” cardstock for card base
  • Cut two white cardstock panels 1 5/8” x 5 3/8”; one rectangle for card front panel smaller than patterned paper panel
  • Patterned paper for front panel rectangle cut slightly larger than the white panel.
  • Cardstock scraps for stamping and die cutting flowers and leaves
Directions:
  • Score card base at 4” from both sides. Then score card base at 2 1/8” from both sides. See the second image above. Trim 1/4” plus a little bit from each end. That will allow the side panels to fold in under the card front panel.
  • Stamp and decorate the inside white cardstock panels and adhere them to the inside panels of the card as in the third image above.
  • Measure or die cut a white panel (used the second largest die from Radiating Stitches die on this card).  Stamp flowers on white cardstock scrap. Then die cut or punch them out and add to this panel. Attach this panel to the patterned paper rectangle.
  • Attached the finished front card panel to the middle (the scored 1/2” panel) of the card base with dimensionals. Then fold the outside panels in under the front card panel. See last image above.
  • Stamp envelope if desired.

Products needed to make this card can be found on my Online Store

Products:
  • Sentimental Park Bundle 160567
  • Petal Park Bundle 160577
  • Around the Bend Dies 160649
  • Country Gingham 6” x 6” DSP 160388
  • Radiating Stitches Dies 161595
  • Balmy Blue Cardstock 146982
  • Basic White Cardstock 159276
  • Mint Macaron Cardstock 146982
  • Petal Pink Cardstock 146985
  • Balmy Blue 147107 and Petal Pink 147108 Classic Stampin’ Pads
  • 2021-2023 In Color Opal Rounds 159185


Monday, March 20, 2023

March 2023 Card Layout #18

March 2023 Card Layout #18
SU’s On The Farm Bundle and Flowers and More DSP

This layout is called a swing window fun fold. So much fun to use the On The Farm Bundle with this DSP.

The products need to make this card can be found in my Online Store


Measurements:
  • 5 1/2” x 8 1/2” cardstock for card base
  • 4 x 5 1/4” cardstock or DSP layer
  • 2 1/2” x 6” DSP for envelope-optional
  • 5 1/4” x 8” cardstock for inside panel and scrap for die cut shape-circle or square
Directions: 
  • Score card base at 4 1/4” and fold on score line.
  • Adhere the cardstock or DSP layer to card front. If you want, you can emboss the cardstock, but be sure to only use glue for the die cut opening before die cutting. Then you can emboss the cardstock and adhere it to the front matching up the opening.
  • On the inside panel, score at 2”, 4” and 6”. Follow the third picture above to see how to adhere the inside panel.
  • Adhere the die cut shape as shown in the second picture.
  • Adhere the optional envelope DSP to envelope flap and trim.
The products need to make this card can be found in my Online Store

Products:

March 2023 Card Layout #17

 March 2023 Card Layout #17
SU’s Like An Animal DSP

I had a hard time trying to come up with a card layout for SU’s Like An Animal DSP. I loved the designs in this DSP, so of course I had to  purchase it. Also, SU’s doesn’t have any silver foil that is current. So I used silver embossing powder for the sentiment. Another technique is to use SU’s blending brushes and ink with the DSP. An idea for a card later!!

The products needed to make this card can be found in my Online Store


Measurements:
  • 5 1/2” x 8 1/2” cardstock for the base (I used SU’s Basic Gray but Smoky Slate would work, too.
  • 3 3/4” x 5” cardstock for the second layer-same color as the base; scrap for sentiment
  • 3/4” strips of DSP; 2 1/2” x 6” DSP for envelope
Directions:
  • Score the base at 4 1/4” and fold on the score line.
  • Apply 3/4” strips to the second layer of cardstock starting with the first strip at the very top.
  • Adhere this layer using dimensionals to the card front.
  • Stamp sentiment with VersaMark and heat emboss with silver embossing powder. Die cut the sentiment. Carefully run the edges along the VersMark pad and heat emboss with silver embossing powder. Adhere to card front with dimensionals.
  • Adhere the DSP panel to the envelope flap and trim.
The products needed to make this card can be found in my Online Store
  • Like An Animal Specialty DSP 160841
  • Something Fancy Bundle 160425
  • Basic Gray cardstock 121044
  • Stampin’ Emboss Powders 155555
  • Rhinestone Basic Jewels 144220


Sunday, March 19, 2023

March 2023 Card Layout #16

 March 2023 Card Layout #16
SU’s Irresistible Blooms and Hello, Irresistible DSP

A simple card layout for this post. The first image shows a very simple card. The second image shows when more foliage is added. Which do you prefer?


The products needed to design this card can be found in my Online Store

Measurements: 
  • 5 1/2” x 8 1/2” cardstock for card base
  • 4” x 5 1/4” cardstock
  • 3 3/4” x 5” patterned paper; 2 1/2” x 6” patterned paper panel for envelope
  • Scrap of cardstock for sentiment
Directions:
  • Score the card base at 4 1/4” and fold on the score line.
  • Adhere cardstock panel (can be embossed) at an angle and trim.
  • Stamp sentiment on cardstock scrap and adhere to card front.
  • Adhere images, die cuts, or fussy cut images.
  • Add embellishments.
  • Adhere the patterned paper panel to the envelope flap and trim.
The products needed to design this card can be found in my Online Store

Products:
  • Irresistible Blooms Bundle 161150
  • Hello, Irresistible DSP 161139
  • Raindrops Embossing Folder 160554
  • Flirty Flamingo cardstock 141416
  • So Saffron cardstock 105118
  • Basic White cardstock 159276
  • 2021-2023 In Color Opal Rounds 159185

Saturday, March 18, 2023

March 2023 Card Layout #15

 March 2023 Card Layout #15
SU’s Irresistible Blooms Bundle and Hello, Irresistible DSP

Was lucky to have some Pretty Peacock cardstock and ink pad that was an incolor with SU about 4 years ago. One of my favorite colors!! Rumor says Pretty Peacock is coming back this spring with SU’s color refresh. Makes me happy. Pretty Peacock and Lost Lagoon are used in SU’s Hello, Irresistible DSP. Lost Lagoon is from 9 years ago! Pretty Peacock was used on this card. Pretty Peacock cardstock and ink pad will be available in the new SU Annual Catalog due to come to in May.

Products (except for Pretty Peacock cardstock and ink pad) can be found in my Online Store


Measurements:
  • 5 1/2” x 8 1/2” cardstock for base; 3” square cardstock and scraps for flowers and leaves
  • Cut two @ 1 7/8” x 5 1/4” DSP; 2 3/4” square DSP; 2 1/2” x 6” DSP for envelope flap
  • Cut three 2 1/2” squares of white cardstock to make the slide.
  • 2 1/4” square white cardstock and 4” x 5 1/4” white cardstock for inside
Directions:
  • Score cardstock for base at 2 1/8”. Fold on score line and burnish with bone folder. Fold opposite side in to meet in the middle and burnish with bone folder. This works better than scoring the opposite side.
  • Fold two of the 2 1/2” squares of cardstock in half. Lay them and adhere the squares to the remaining 2 1/2” square with the folds meeting in the center. 
  • On the other side glue the 3” square of cardstock. That forms the mechanism for the slide. If you need more help, just search for  Slide and Lock Cards on Pinterest.
  • Adhere the 2 3/4” square of DSP to the cardstock square on the slide.
  • Stamp sentiment and add stamped images or die cuts to the 2 1/4” white cardstock square. Add embellishments. Adhere to form a diamond shape. 
  • Adhere the 4” x 5 1/4” white panel to the inside of card.
  • Add the slide to the card front panels.
  • Adhere the DSP panel to the envelope flap and trim.
Products (except for Pretty Peacock cardstock and ink pad) can be found in my Online Store
Some products are “currently unavailable” are in process of being in stock again.
Products:
  • Irresistible Blooms Bundle 161150
  • Hello, Irresistible DSP 161139
  • Basic White Cardstock 159276
  • Loose Frosted Dots 161153

Friday, March 17, 2023

March 2023 Card Layout #14

 March 2023 Card Layout #14
Gatefold Latch Card 
SU’s Season of Chic Bundle and By the Bay DSP

I did not purchase SU’s Seaside Bay stamp set, but I loved the By The Bay DSP with its gold and pearl foil!! The sea shell stamp and die from SU’s Season of Chic Bundle makes the perfect latch for this thank you card. 

Products needed to make this card can be found in my Online Store


Measurements:
  • 5 1/2” x 8 1/2” cardstock for the card base
  • Cut two panels of DSP 1 3/4” x 5 1/8”
  • Cut two panels of cardstock 1 7/8” x 5 1/8”
  • 2 1/2” x 6” DSP for the envelope flap
  • White cardstock scraps for label and latch
Directions:
  • Score the card base at 2 1/8” on one side. Fold and burnish with a bone folder.  Fold the opposite to meet in the middle and burnish with a bone folder. This works better than scoring the opposite side and folding to meet in the middle.
  • Adhere the two DSP panels to the two cardstock panels. Adhere these to the panels on the card front.
  • Stamp the shell and die cut it out. This is the latch for the gatefold. Adhere to the right side of the card front with dimensionals leaving the top of the latch free so the label will slide under it to keep the fold closed.
  • Stamp the label with a sentiment.
  • Adhere label to the left side of the card so that it can slide under the latch. 
Products needed to make this card can be found in my Online Store

Products:
  • Season of Chic Bundle 158816
  • By the Bay DSP 160434
  • Night of Navy Cardstock 100867
  • Balmy Blue Cardstock 146982
  • Basic White Cardstock 159276
  • Night of Navy Classic Stampin’ Pad 147110

March 2023 Card Layout #13

 March 2023 Card Layout #13
SU’s True Beauty Bundle and Awash In Beauty DSP

Here’s a fun fold that shows both sides of double sided patterned paper like SU’s Awash In Beauty DSP.

The products need to make this card can be found in my Online Store


Measurements:
  • 5 1/2” x 5 1/2” cardstock for the base
  • 4 x 5 1/4” double sided patterned paper (DSP)
  • Two panels of DSP 1” x 5 1/4”; 2 1/2” x 6” panel for the envelope flap
  • 4” x 5 1/4” for the inside and scraps of white cardstock for label and sentiment
Directions:
  • Score cardstock base at 4 1/4” and burnish with a bone folder.
  • Adhere the large patterned paper panel to the inside of the flap of the card front.
  • Adhere one of the smaller patterned paper panels to the white cardstock panel and adhere the white panel to the side of the card.
  • Adhere the other patterned paper panel to the outside flap of the card front.
  • Add label and sentiment to card front. 
  • Adhere the the remaining patterned paper to the envelope flap and trim.
The products need to make this card can be found in my Online Store

Products:
  • True Beauty Bundle 158984
  • Awash In Beauty DSP 158973
  • Merry Merlot Cardstock 146979
  • Basic White Cardstock 159276
  • Merry Merlot 147112 and Mossy Meadow 147111 Classic Stampin’ Pads

Wednesday, March 15, 2023

March 2023 Card Layout #12

March 2023 Card Layout #12
SU’s True Beauty Bundle and Awash In Beauty DSP

Thank you to Lisa Curcio for the “fun fold pop up and pivot card”. This is my version of this fun fold. Again, so much fun to make this card with the beautiful DSP and cardstock and coordinating inks.
Products needed for this card can be found in my Online Store


Measurements:
  • 4 1/4” x 11” cardstock for card base
  • 4 x 5 1/4” DSP for top layer
  • Any die cut shape
  • 2” x 4” cardstock for pop up mechanism
  • 1” x 2” cardstock for tab
Directions: See Lisa Curcio’s YouTube video.

Products needed for this card can be found in my Online Store

Products:


May 2023 Card Layout #2

 May 2023 Card Layout #2 SU’s Irresistible Blooms Bundle and Hello, Irresistible DSP Great layout so show off this DSP. I was lucky to have ...