Sunday, March 12, 2023

March 2023 Card Layout #10

 March 2023 Card Layout #10
SU’s True Beauty Bundle, Basic Border Dies, and Awash In Beauty DSP

Here’s another fun fold using some beautiful DSP (double sided patterned paper)from Stampin’ Up! I will be sorry to see this go this spring! The products need to make this card can be found in my Online Store


Measurements:
  • 5 1/2” x 12” double sided patterned paper (DSP)
  • 4 1/4” x 5 1/2”cardstock for the card base
  • 3 3/4” x 5” white cardstock for the inside
  • Scrap of white cardstock and colored cardstock for label
Directions:
  • Score the patterned paper at 4” and 8”. For in on score lines. Cut the top layer of the card front with a border die.

  • Fold the inside layer almost in half leaving a border on the right side. Cut along the edge with the same border die used in the previous step.


  • Add ribbon around the patterned paper (DSP) and adhere the DSP to the card base.
  • Stamp and adhere the label to the front flap of the card.
  • Stamp the envelope.
The products need to make this card can be found in my Online Store

Products:
  • True Beauty Bundle 158984
  • Awash in Beauty DSP (double sided patterned paper) 158973
  • Basic Borders Dies 155558
  • Basic White Cardstock 159276
  • Granny Apple Green Cardstock 146990
  • Mossy Meadow Cardstock 133676
  • White Crinkled Seam Binding Ribbon 151326
  • Classic Stampin’ Pad Calypso Coral 147101 and Mossy Meadow 147111
  • Stampin’Blends Granny Apple Green 154885 and Mossy Meadow 154890 to color ribbon

Saturday, March 11, 2023

March 2023 Card Layout #9

 March 2023 Card Layout #9
SU’s Ginkgo Branch Bundle, By the Bay DSP and Fine Shimmer Paper Pack

SU’s Find Shimmer Paper is so beautiful that I couldn’t wait to use the Ginkgo dies and stamps!

Products needed to make this card can be found in my Online Store


Measurements: 
  • 4 1/4” x 11” cardstock for the base
  • 4” x 5 1/4” patterned paper or embossed cardstock
  • 2 5/8” x 3 1/2” patterned paper or embossed cardstock
  • 3” x 3” patterned paper or embossed cardstock
  • Scarp of cardstock for sentiment
Directions:
  • Fold cardstock in half to make the base
  • Adhere the panel of patterned paper or embossed cardstock to the front of the card base.
  • Adhere wider patterned paper or embossed cardstock to the card front.
  • Adhere the 3” square to the card front.
  • Add die cut images and sentiment.
Products needed to make this card can be found in my Online Store

Products:
  • Ginkgo Branch Bundle 160469
  • By the Bay DSP 160434
  • Fine Shimmer Paper Pack 160428
  • Cane Weave 3D Embossing Folder 160580
  • Sahara Sand Cardstock 121043
  • Soft Succulent Classic Stampin’ Pad 155778

Friday, March 10, 2023

March 2023 Card Layout #8

 March2023 Card Layout #8
SU’ Petal Park Bundle, Sentimental Park Bundle and Design A Daydream DSP

Another fun fold pocket card using patterned paper. It’s best to use a pattern that is non-directional.

Products needed to make this card can be found in my Online Store


Products:


Measurements:
  •  4 1/4” x 5 1/2” cardstock for base
  • Double sided patterned paper: 8” x 10 1/2” ; 3/4” x 3 1/4”; and 1” x 4”
  • 3 1/4” x 4 3/4” white cardstock
Directions:
  • Score large panel of double sided patterned paper at 4” on the 8” side and 5 1/4” on the 10 1/2” side. Choose the panel you want for the card front.

  • Cut out the bottom left panel. Then cut off the two smaller panels from the left over panel.

  • Fold the patterned paper.


  • Fold the front panel down and across.

  • Adhere the fold to the card front and to the inside. On the inside make sure to use just a fine line of glue so that the pocket has room for the card insert.


  • Add the 3/4” x 4” patterned paper strip to the top of the white cardstock panel and add the card insert into the inside pocket.


  • Add the patterned paper to the cardstock base. Optional to add the remaining panel to the card front.


Products needed to make this card can be found in my Online Store


Tuesday, March 7, 2023

March 2023 Card Layout #7

 March 2023 Card Layout #7
SU’s Irresistible Blooms Bundle and Texture Chic Specialty DSP

This is a fun fold card called the Zig-Zag Pocket Card. You can have one pocket or two pockets. The first 2 images are of the two pocket fold. The last 2 images are of the one pocket fold. Products needed to make this fun fold card layout can be found in my Online Store
  • Irresistible Blooms Bundle 161150
  • Texture Chic Speciality DSP 158808
  • Pool Party Cardstock 122924
  • Evening Evergreen Cardstock 155574
  • Basic White Cardstock 159276
  • Desert Details Dies 160531
  • 2021-2023 In Color Opal Rounds 159185


I only did the basic card layout to show how it could have only one pocket. Both card samples use SU’s Texture Chic Specialty DSP


Measurements:
  • Card base 4 1/4” x 5 1/2” cardstock
  • Patterned paper 5 1/4” x 12”; 2 1/2” x 6” for envelope
  • White cardstock 3” x 4 1/4”
  • Colored cardstock 3 1/2” x 4 3/4”; scraps for flowers and leaves
Directions:
  • Score patterned paper @ 4” and 8”. Fold on score lines. 
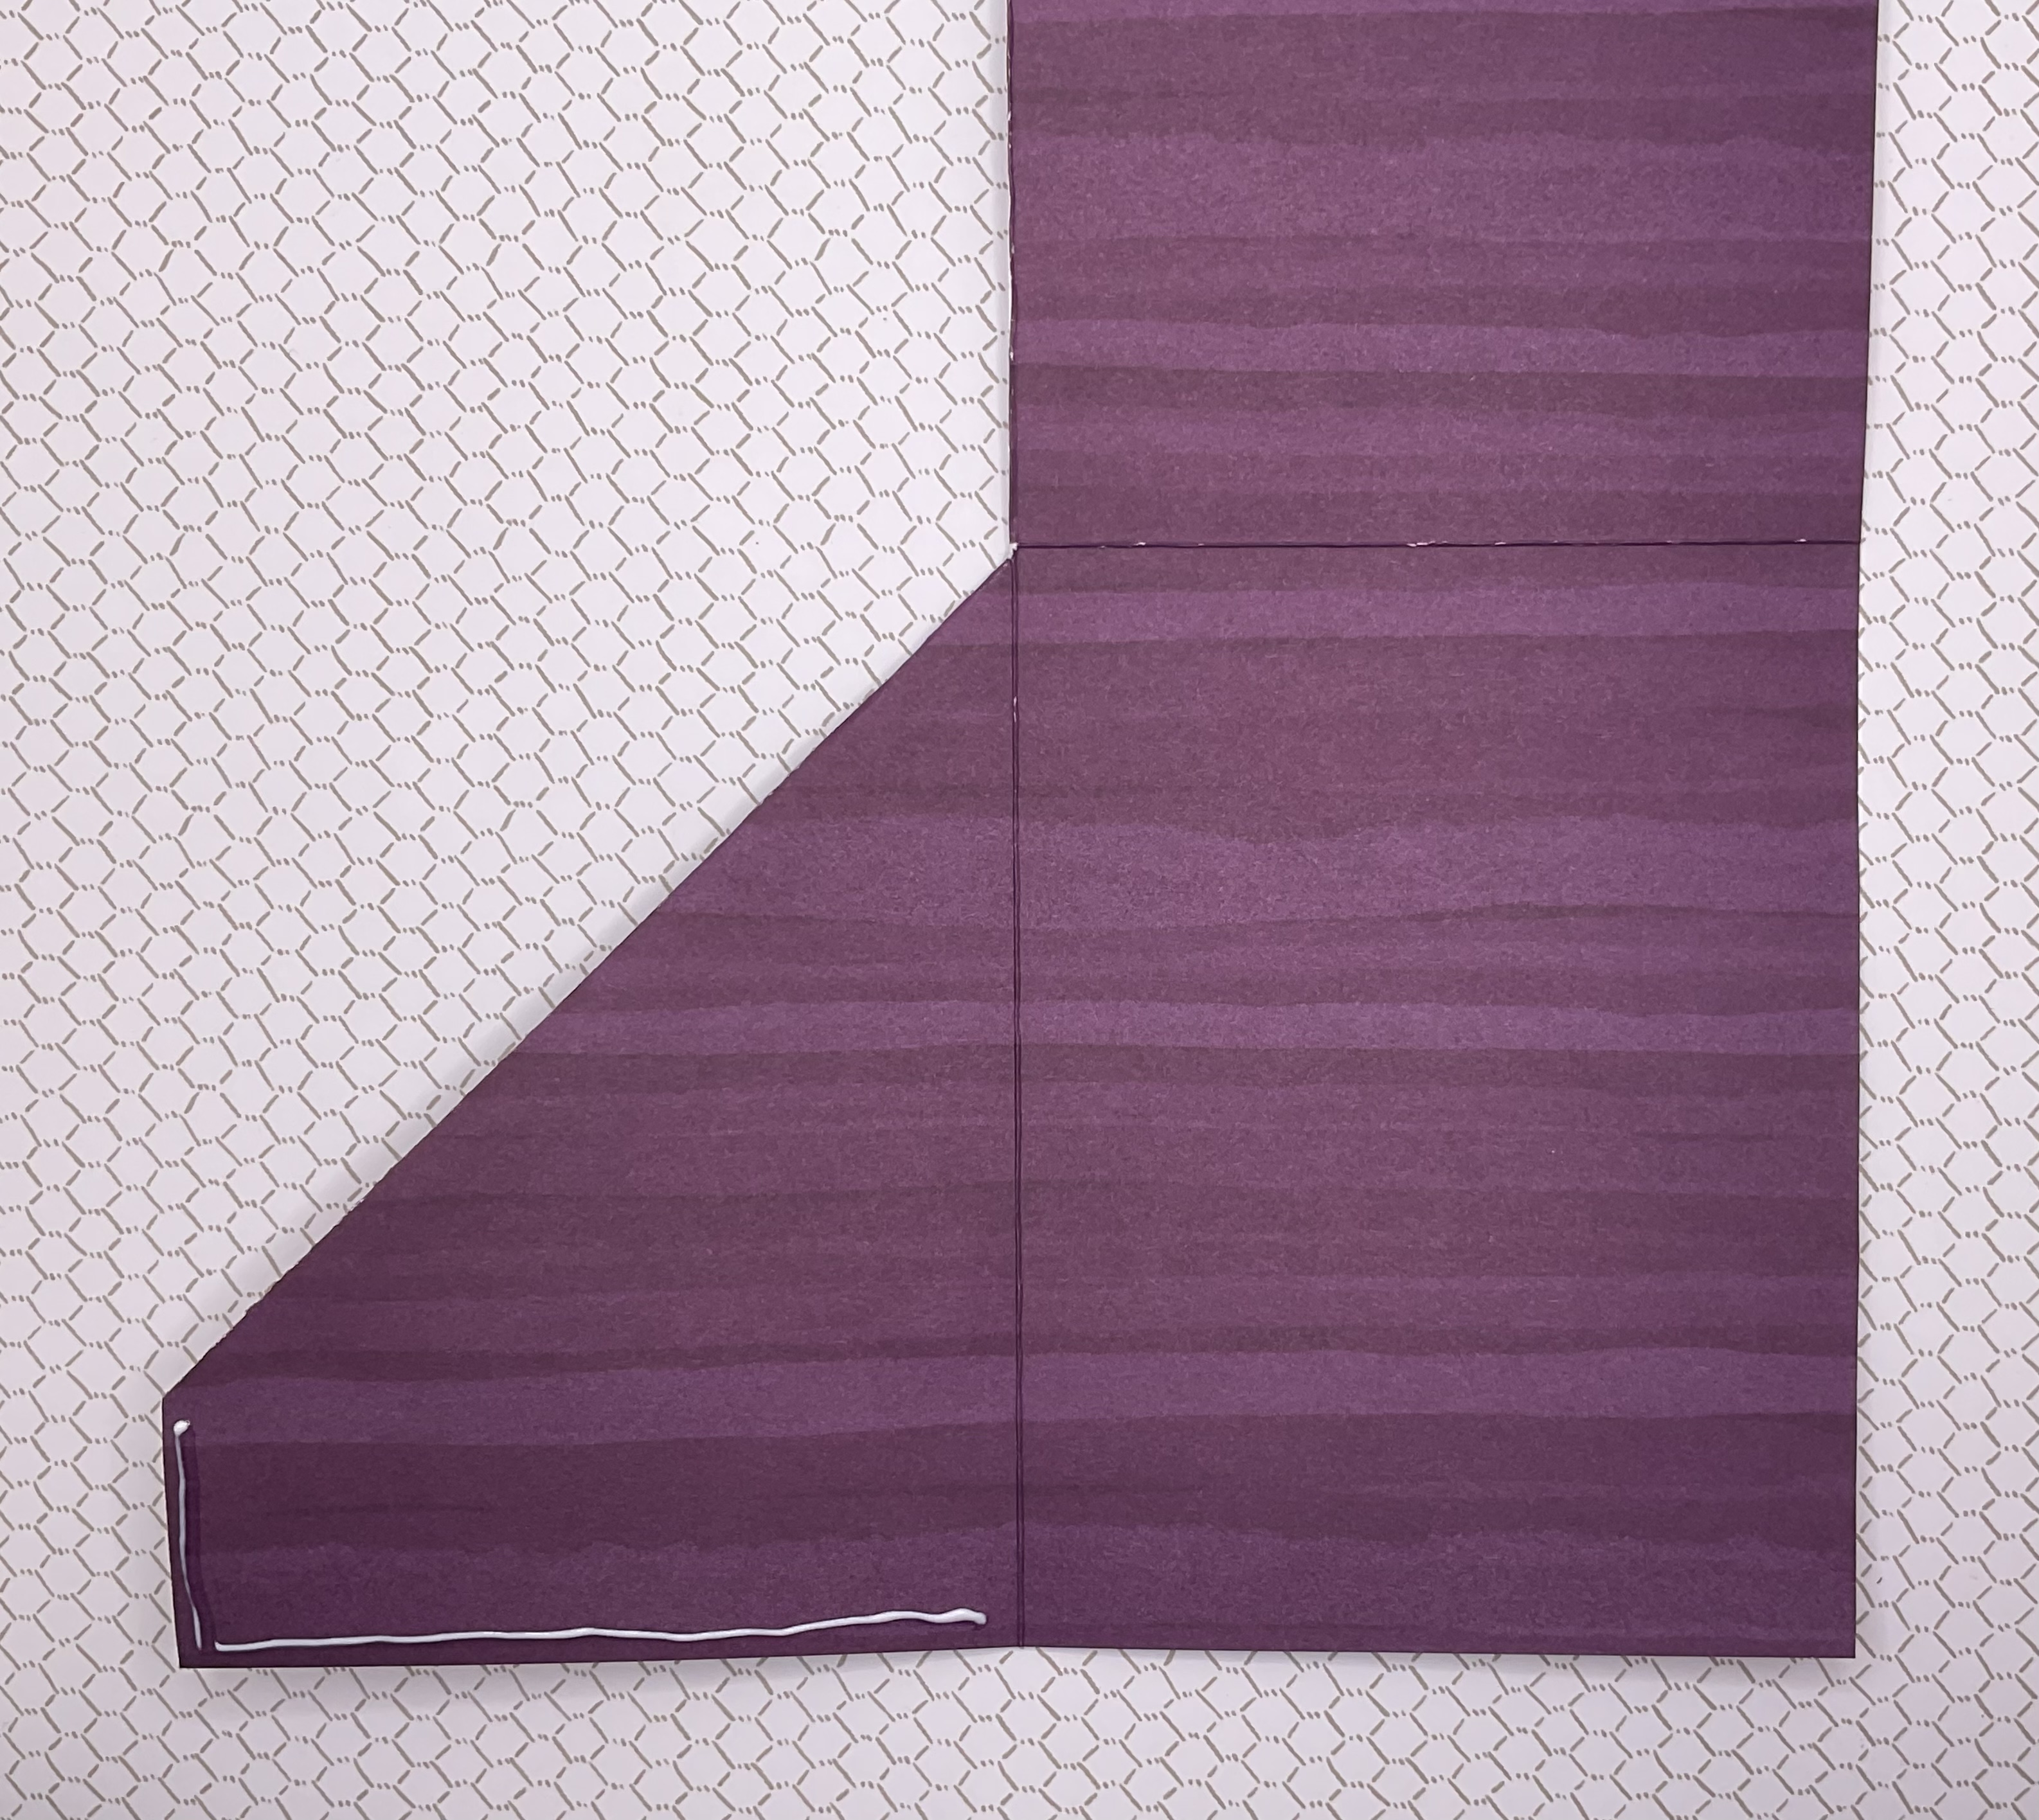
  • Unfold the DSP. Mark up two inches from the bottom of the first section. Cut from top of the second fold across to the mark. The finished cut should look like this:

  • Fold on the score lines for the zig-zag:

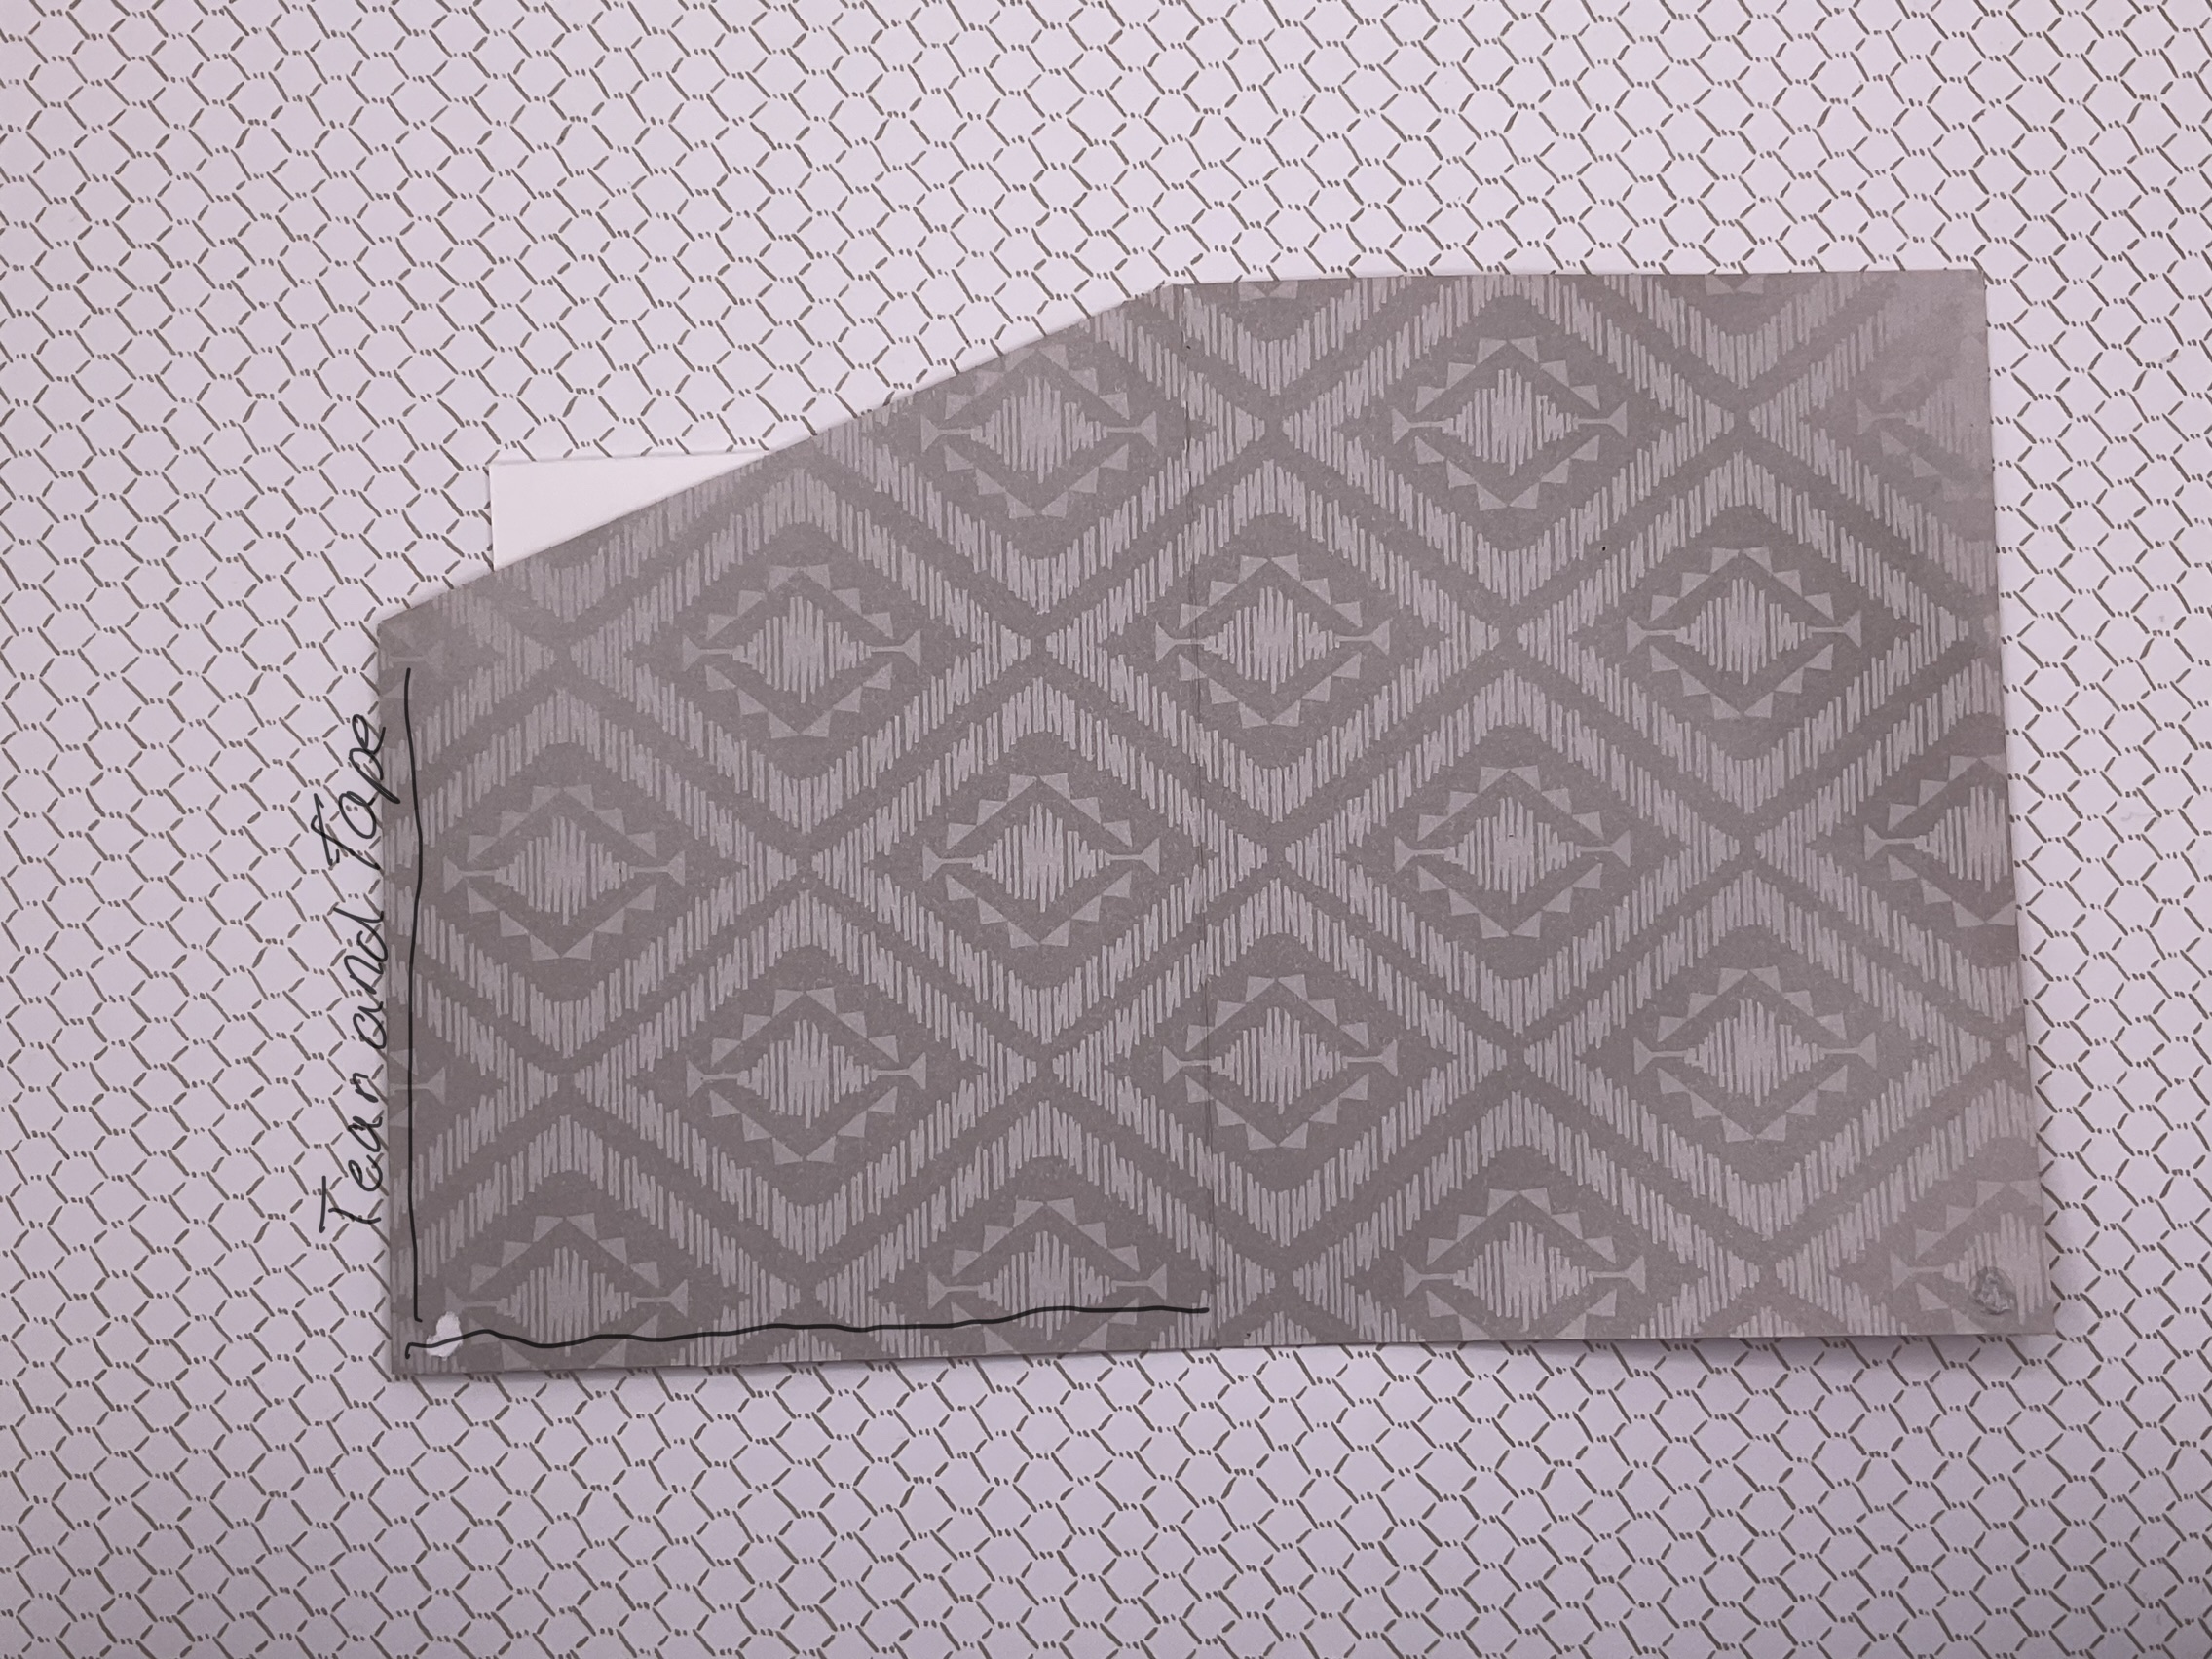
  • Add Tear and Tape or a very thin line of liquid glue as shown below:

  • Fold the flap back again to form the front pocket so the white cardstock fits inside:

  • Add Tear and Tape and fold for an optional second pocket:

  • Add stamping, die cuts, embellishments to both cardstock pockets.
  • Adhere envelope patterned paper panel to the envelope flap and trim.    
Products needed to make this fun fold card layout can be found in my Online Store
  • Irresistible Blooms Bundle 161150
  • Texture Chic Speciality DSP 158808
  • Pool Party Cardstock 122924
  • Evening Evergreen Cardstock 155574
  • Basic White Cardstock 159276
  • Desert Details Dies 160531
  • 2021-2023 In Color Opal Rounds 159185

March 2023 Card Layout #6

  • March 2023 Card Layout #6
SU’s Fancy Flora DSP

A very simple card layout for today. SU’s Fancy Flora DSP is so beautiful. I had a hard time picking the pattern for this layout!! The products need to make this card can be found in my Online Store


Measurements:
  • Card base 4 1/4” x 5 1/2” cardstock
  • White cardstock layer 3 1/4” x 4 1/2”
  • Cardstock 3 3/8” x 4 5/8”
  • Patterned paper cut two at 1” x 3”; 2” x 3”; and  2 1/2” x 6” for envelope
  • Label
Directions: 
  • Fold card base in half and burnish fold.
  • Adhere DSP pieces to white cardstock layer.
  • Adhere cardstock layer to white cardstock layer.
  • Adhere to card front.
  • Adhere patterned paper for the envelope to the envelope flap and trim.
  • Add label and any embellishments.
The products need to make this card can be found in my Online Store

Products:
  • Fancy Flora 6” x 6” DSP 160413
  • Basic White Cardstock 159276
  • Orchid Oasis Cardstock 159267

Monday, March 6, 2023

March 2023 Card Layout # 5

 March 2023 Card Layout #5
SU’s Season of Chic Bundle and Texture Chic Specialty DSP

So hope that this bundle  is carried over into next years SU’s catalogue!! Will miss the in colors used on these cards! This is a simple strip card, but so fun to use patterned paper and embossed cardstock on the strips. The products needed to make these cards can be found in my Online Store


Measurements:
  • 4 1/4” x 5 1/2” cardstock for the card base
  • 4” x 5 1/4” cardstock layer
  • 1/2 inch strips of cardstock, patterned paper and embossed cardstock
  • 2 1/2” x 6” panel of patterned paper
Directions:
  • Score card base cardstock at 4 1/4” and fold to make the card base.
  • Adhere the 1/2” strips to the cardstock layer. Trim off the overage.
  • Stamp your sentiment.
  • Add die cuts and embellishments.
  • Adhere the panel of patterned paper to the envelope flap and trim.
Products to make these cards can be found in my  Online Store

Products:
  • Season of Chic Bundle 158816
  • Texture Chic Specialty DSP 158808
  • Painted Texture 3D Embossing Folder 154317
  • Painted Posies 3D Embossing Folder 159175
  • Pool Party Cardstock 122924
  • Soft Succulent Cardstock 155776
  • Evening Evergreen Cardstock 155574
  • Mango Melody Cardstock 146989
  • Petal Pink Cardstock 146985
  • Soft Succulent Classic Stampin’ Pad 155778
  • Brushed Brass Butterflies 158136
Products to make these cards can be found in my  Online Store

Saturday, March 4, 2023

March 2023 Card Layout #4

 March 2023 Card Layout #4
SU’s Happy Forest Friends DSP
Easy Corner Bookmark Card Fun Fold

Such a fun fold. Not only is this a birthday card, but it is a gift! A book mark! Thank you to Karen Titus for this fun fold.


Measurements:
  • 4 1/4” x 5 1/2” cardstock base
  • 4” x 5 1/4” patterned paper layer
  • Patterned paper for fussy cutting images
  • 5” square double sided patterned paper; 1” x 3” patterned paper
  • 4 1/4 x 6 1/2” and scrap of white cardstock for a 2” circle
  • Colored cardstock for a 2 1/4” circle
  • 2 1/2” x 6” patterned paper for envelope
Directions:
  • Adhere the patterned paper layer to the cardstock base.
  • Fold 5” square of double sided patterned paper in half. Unfold, turn 90 degree and fold again. Unfold and cut out one square portion. Fold one square up half to make the book mark. Adhere the back two flaps together. (If you need to see a video for help, search for Easy Corner Bookmark Card on Karen Titus’s YouTube channel.)
  • Die cut or punch out circles from white and colored cardstock.
  • Die cut, punch or fussy cut images and adhere them to the white circle. Adhere the white circle to the front of the book mark.
  • Fold the large piece of white cardstock in half. Stamp sentiment (I used a sentiment from SU’s Sending Smiles stamp set.This stamp set has many sentiments that would work well on this card.) Adhere the small piece of patterned paper to the bottom front of this piece. Attach the back of this piece to the card base. 
  • Adhere the patterned paper panel to the envelope flap and trim.
The products needed to make this card can be found in my Online Store

Products:
  • Happy Forest Friends DSP 158941
  • Sending Smiles stamp set 158701
  • Basic White Cardstock 159276 
  • Sweet Sorbet Cardstock 159268
  • Sweet Sorbet Classic Stampin’ Pad 159216

May 2023 Card Layout #2

 May 2023 Card Layout #2 SU’s Irresistible Blooms Bundle and Hello, Irresistible DSP Great layout so show off this DSP. I was lucky to have ...